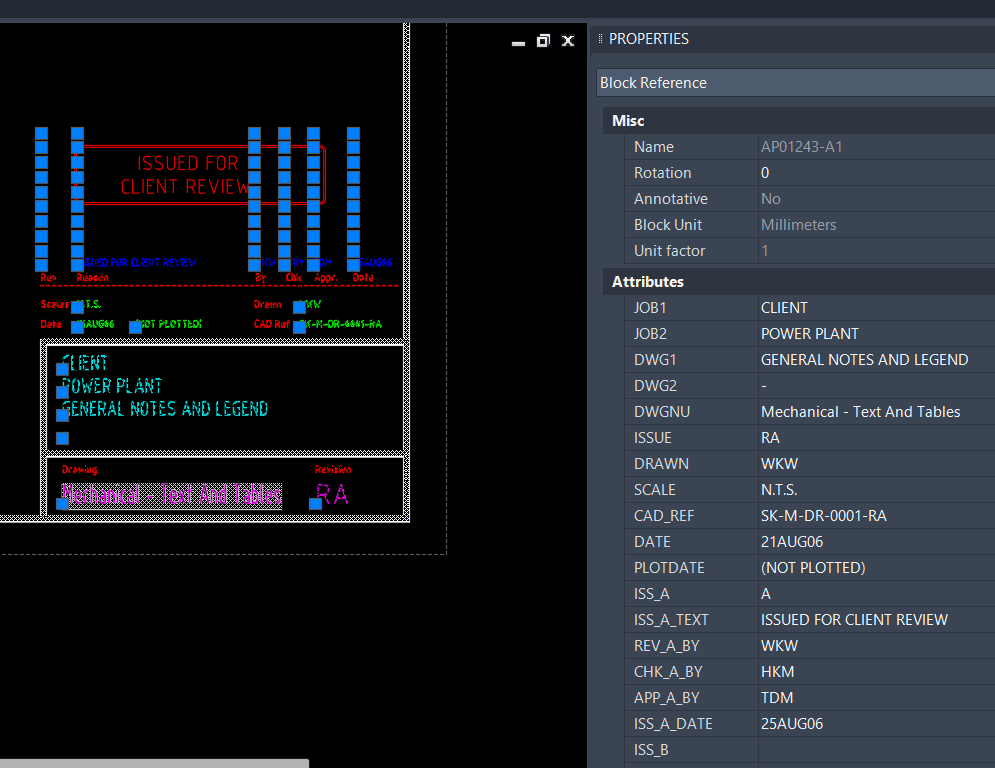
Open a test sample drawing in AutoCAD. There is an existing Title Block:
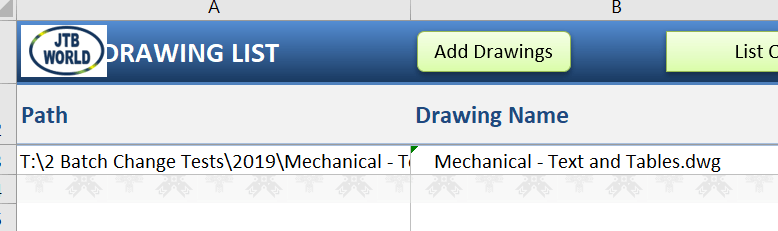
Open a JTB Batch Change.xlsm workbook. Firstly, in "Drawing List" sheet, click Add Drawings and select your drawing(s) to convert.
It is recommended that you try with 1 or 2 test drawings first. Once commands are created and test runs successfully, you can add more drawings to the drawing list.
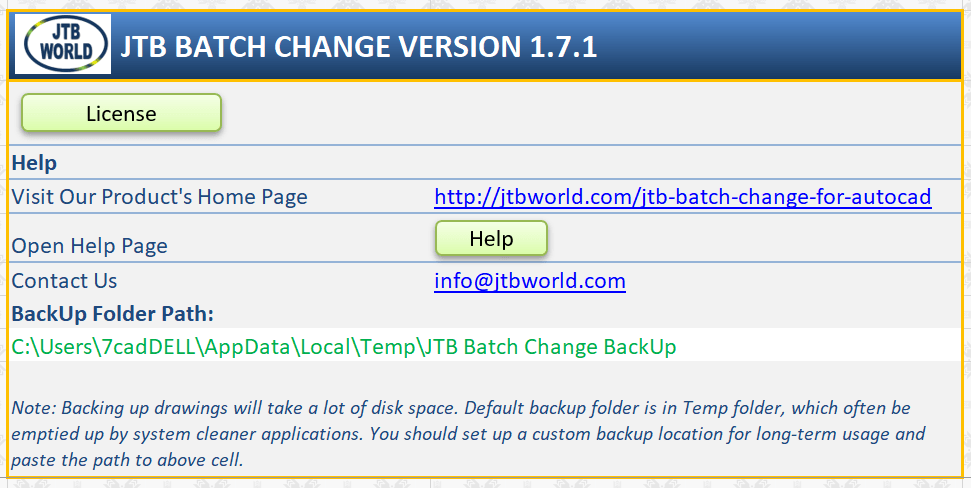
Tip: Remember after the process, you can always restore back up drawings files from the "Back Up" folder, defined in "Help" sheet:
To convert title blocks in the example drawing, here is the to do list:
- Rename all block names "AP01243-A1" to "Title Block A1"
- Change attribute definitions’ tags inside that "AP01243-A1" to your preferred ones.
- Change tags and values of inserted attributes in inserted blocks
For example, here we want to change 4 attribute definitions JOB1, JOB2, DWG1, and DWG2 to TITLE_LINE_1, TITLE_LINE_2, TITLE_LINE_3, and TITLE_LINE_4.
We got to do each task in a separate process.
1. Go to Rename sheet, add a Rename Block Definition command like this:

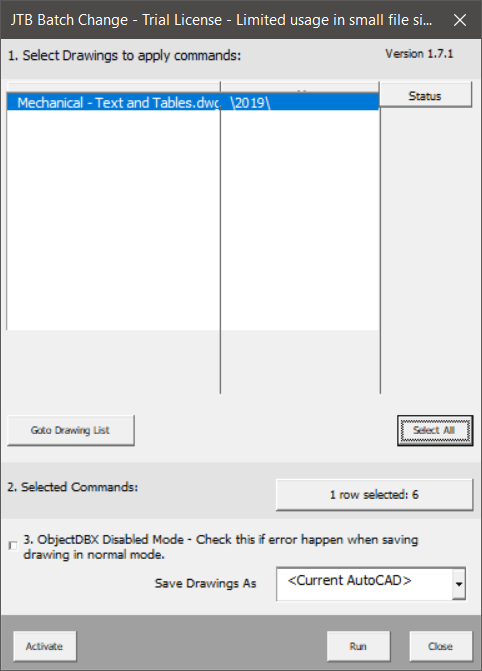
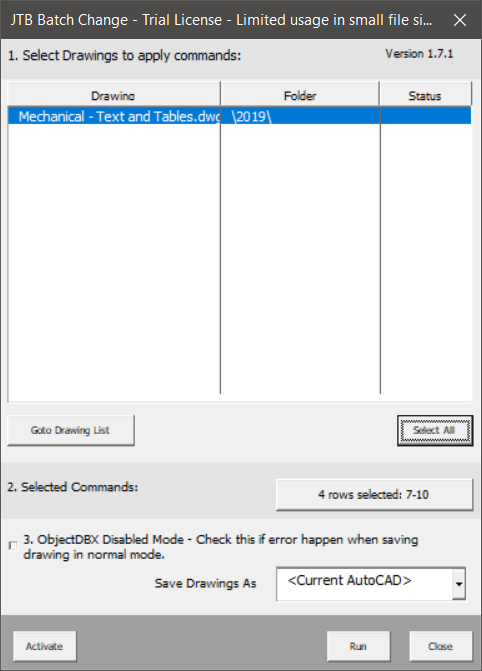
Click [ Run ] button on the top of the sheet. A window will bring up.
In "2. Selected Commands:" section, make sure the newly created row is selected. Click [ Run ] button to start the process.
Once the process is done, a log spreadsheet will be created for you to check. There are also shortcut link to the drawings’ folders and back up folders.
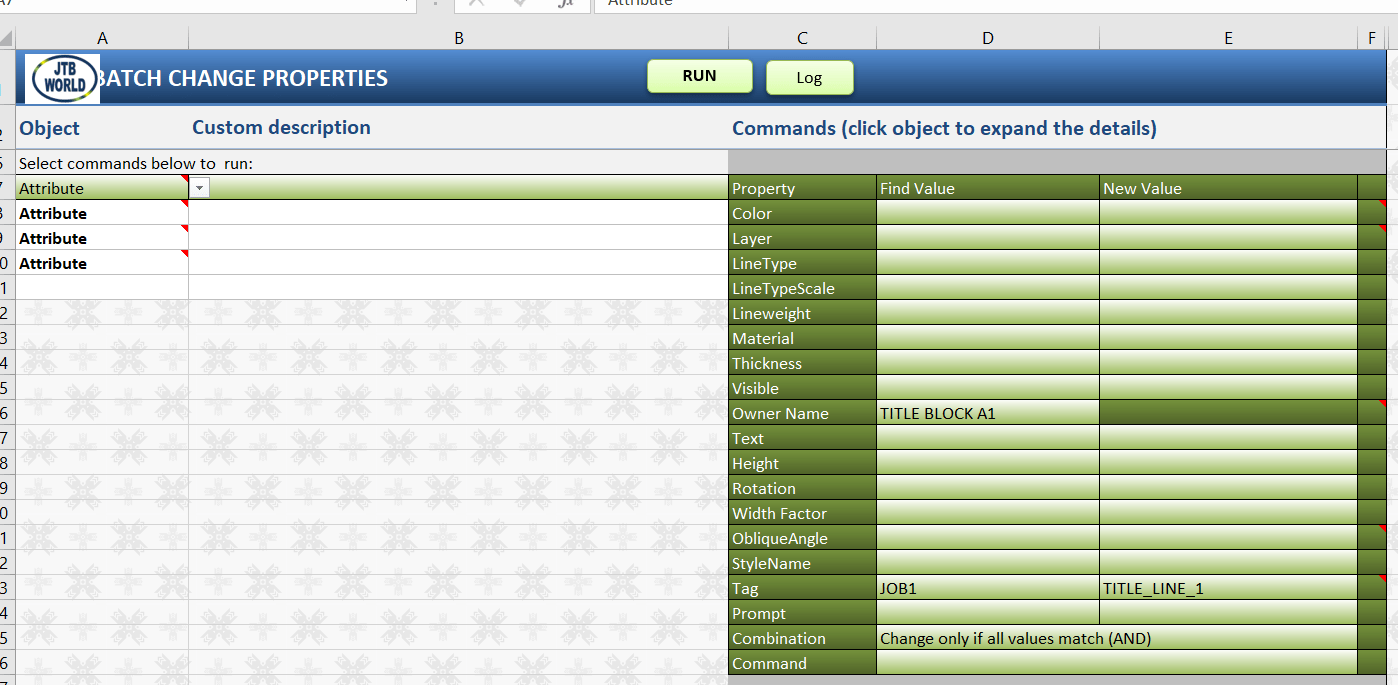
2. Go to "Change" sheet, and add 4 rows of Change Attribute (Definition) commands like this:
Change Attribute in block TITLE BLOCK A1 (the new name of existing block AP01243-A1) where the tag is "JOB1" to "TITLE_LINE_1".
(Note: attribute tag has no space)
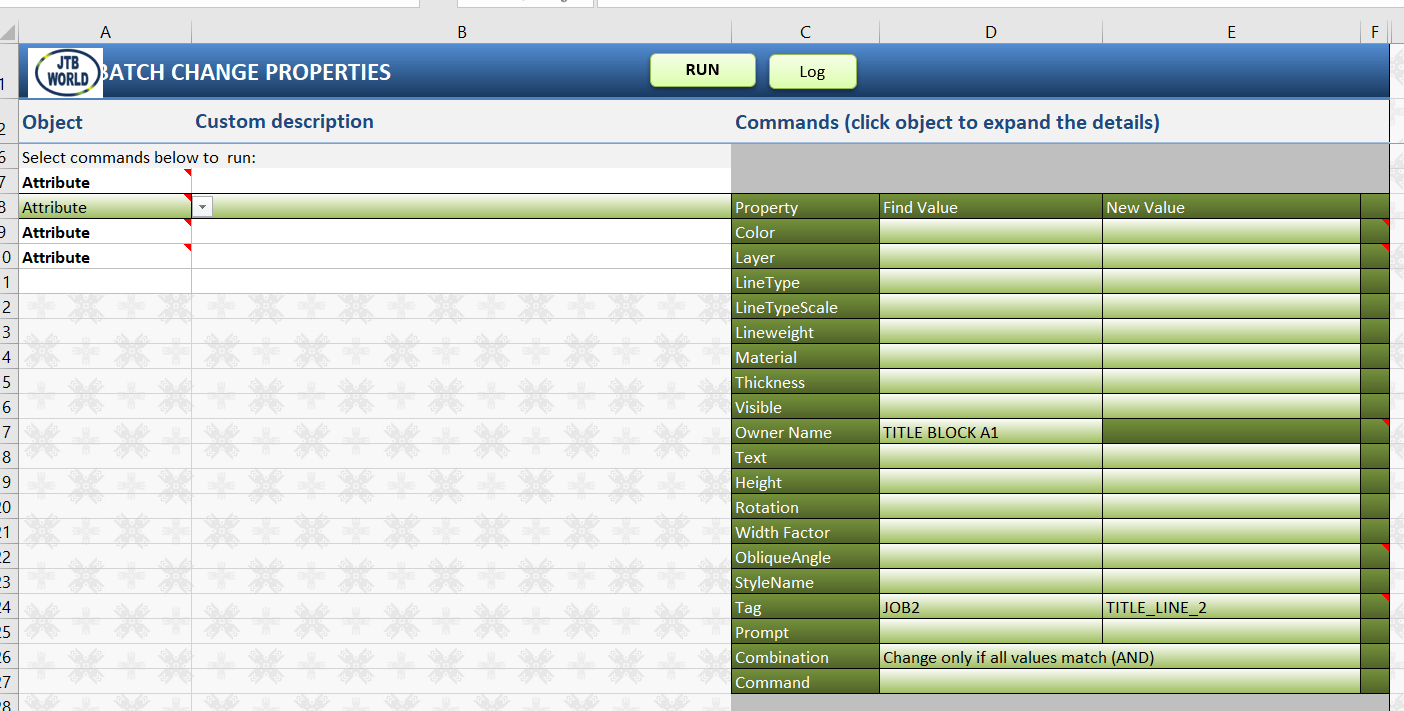
Change Attribute in block TITLE BLOCK A1 where the tag is "JOB2" to "TITLE_LINE_2".
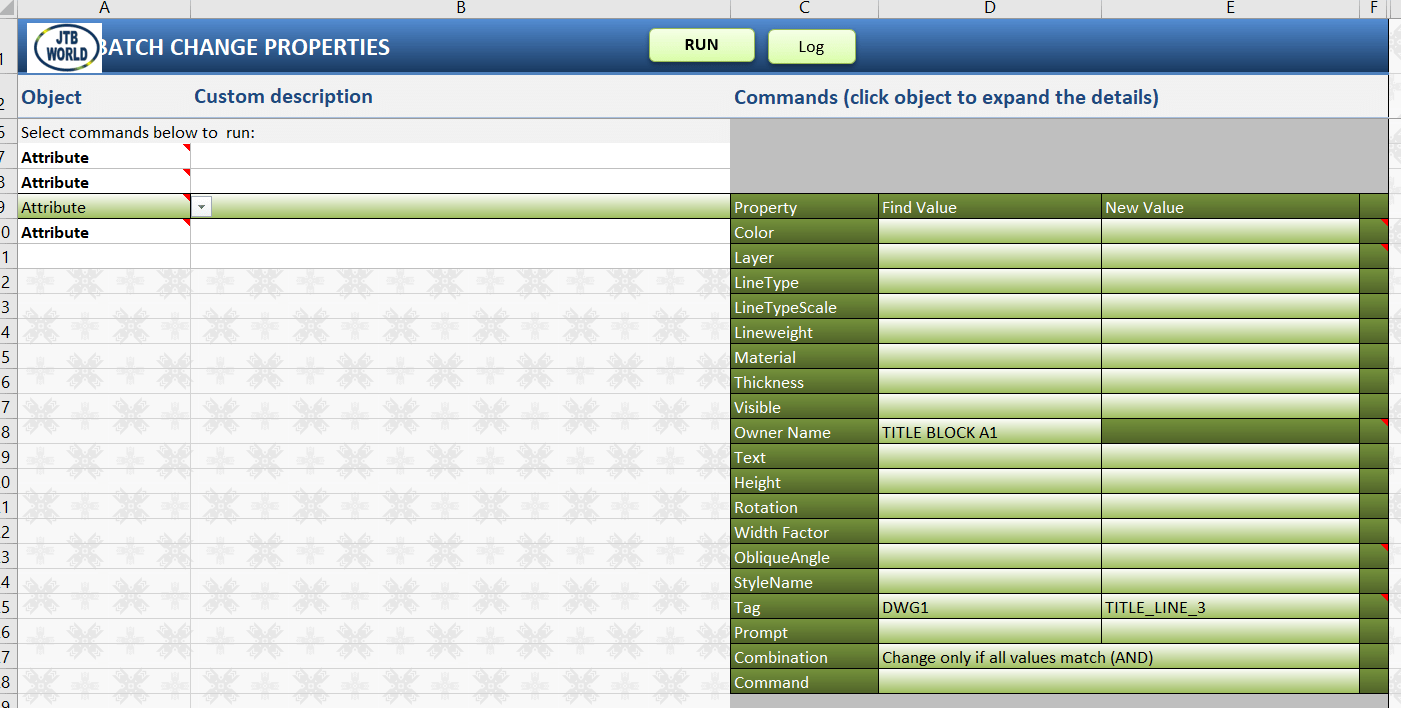
Change Attribute in block TITLE BLOCK A1 where the tag is "DWG1" to "TITLE_LINE_3".
Change Attribute in block TITLE BLOCK A1 where the tag is "DWG2" to "TITLE_LINE_4".
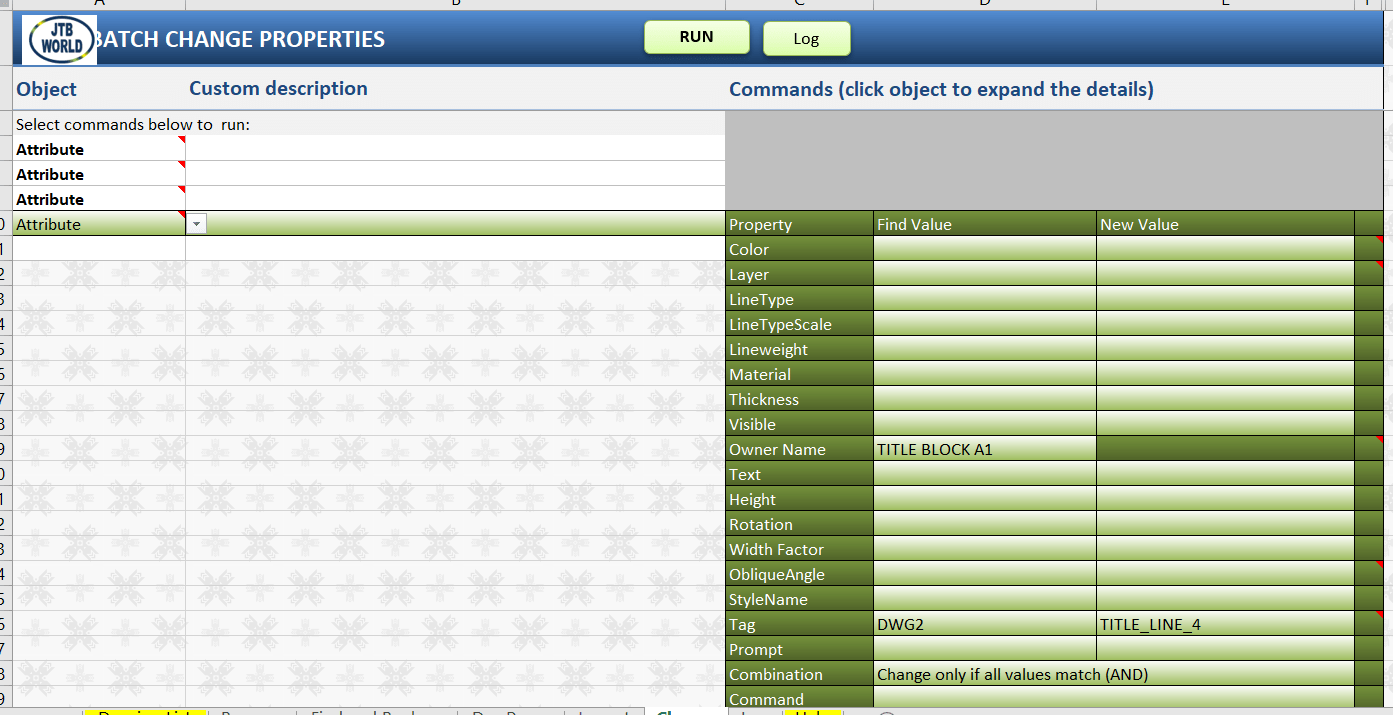
Tip: You can use copy and paste cell in column A down then edit the command details.
Click [ Run ] button on the top of the sheet. A window will bring up.
In "2. Selected Commands:" section, make sure the 4 newly created command cells are selected.
Click [ Run ] button to start the process.
Here is the log spreadsheet after it finishes:

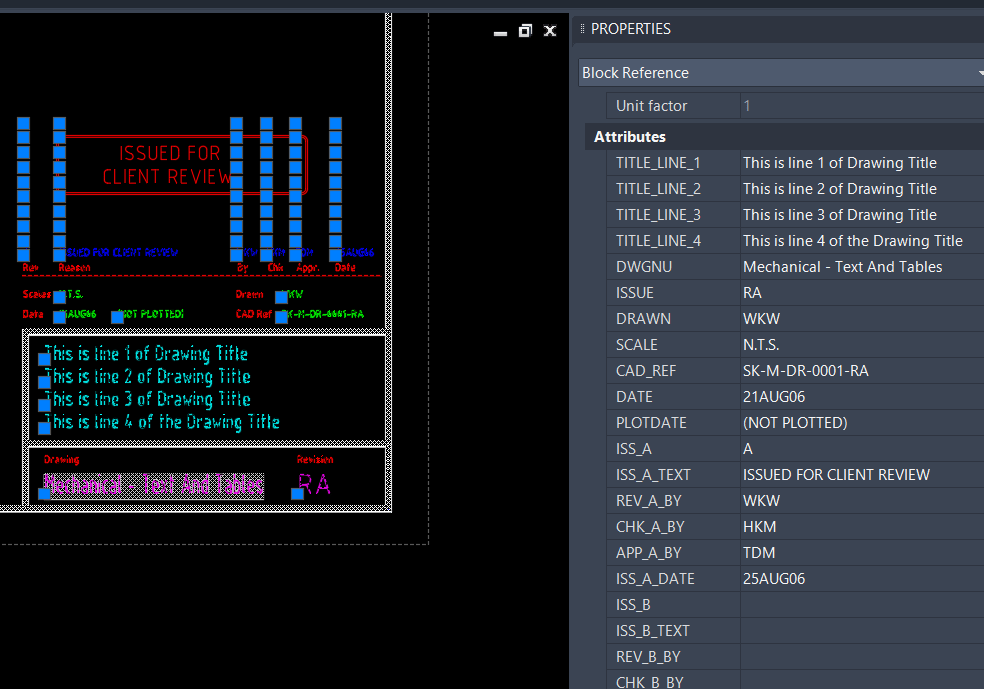
We can open the drawing to check if everything has been changed properly:
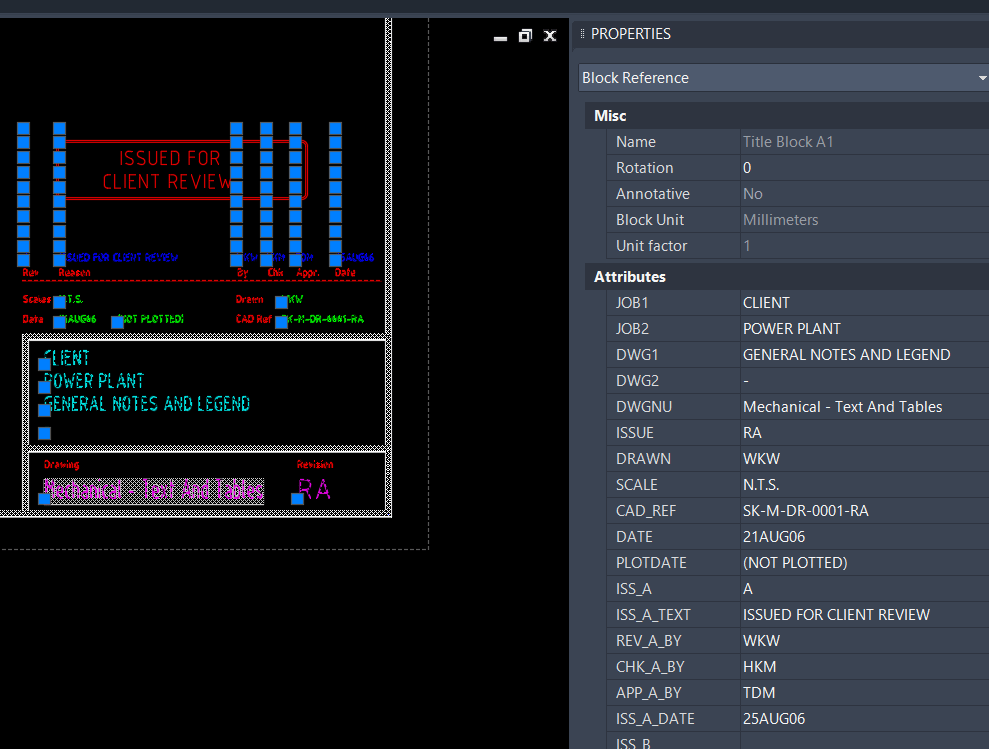
We can see attribute tags are still JOB1, JOB2, DWG1, DWG2. This is because we’ve changed the Attribute Definition inside the block definition only.
To update the attribute tags, in AutoCAD, got to run ATTSYNC command.
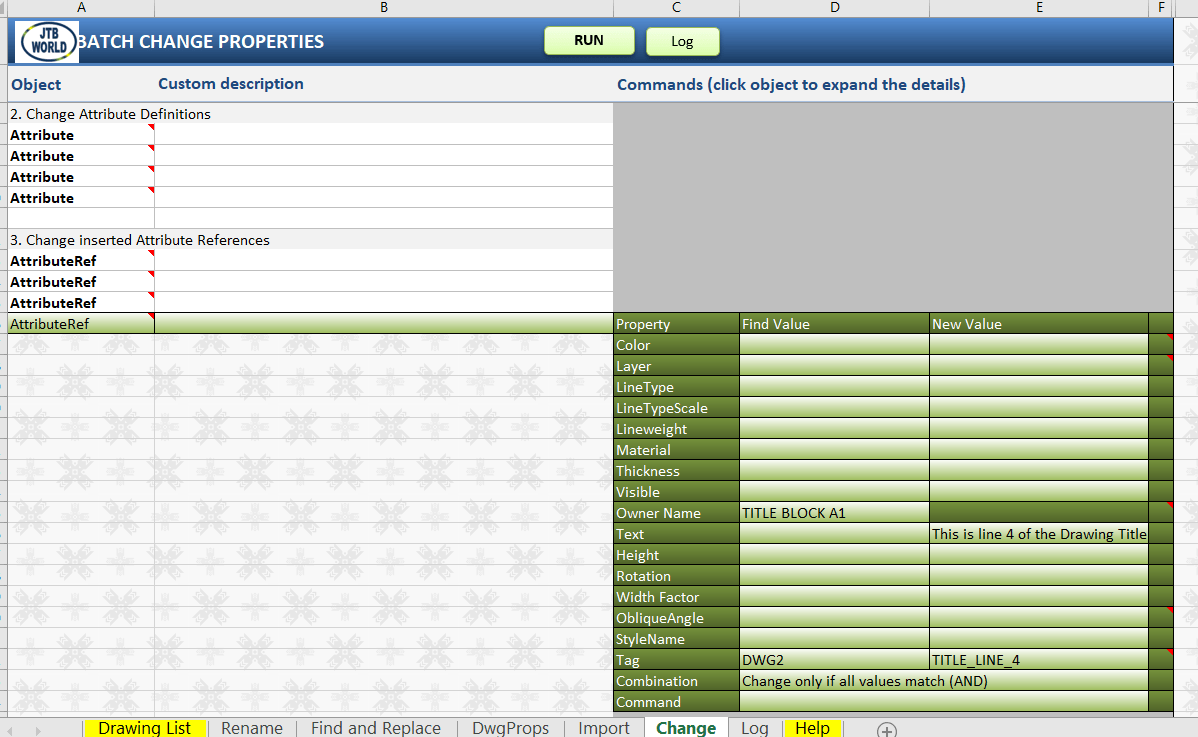
Here, in Batch Change, you can add 4 commands similar to section (2), but, with AttributeRef object.
3. Change AttributeRefs
+ Return to Change sheet, copy 4 command cells in (2) down
+ Change the object type to AttributeRef
+ Type values into Text fields
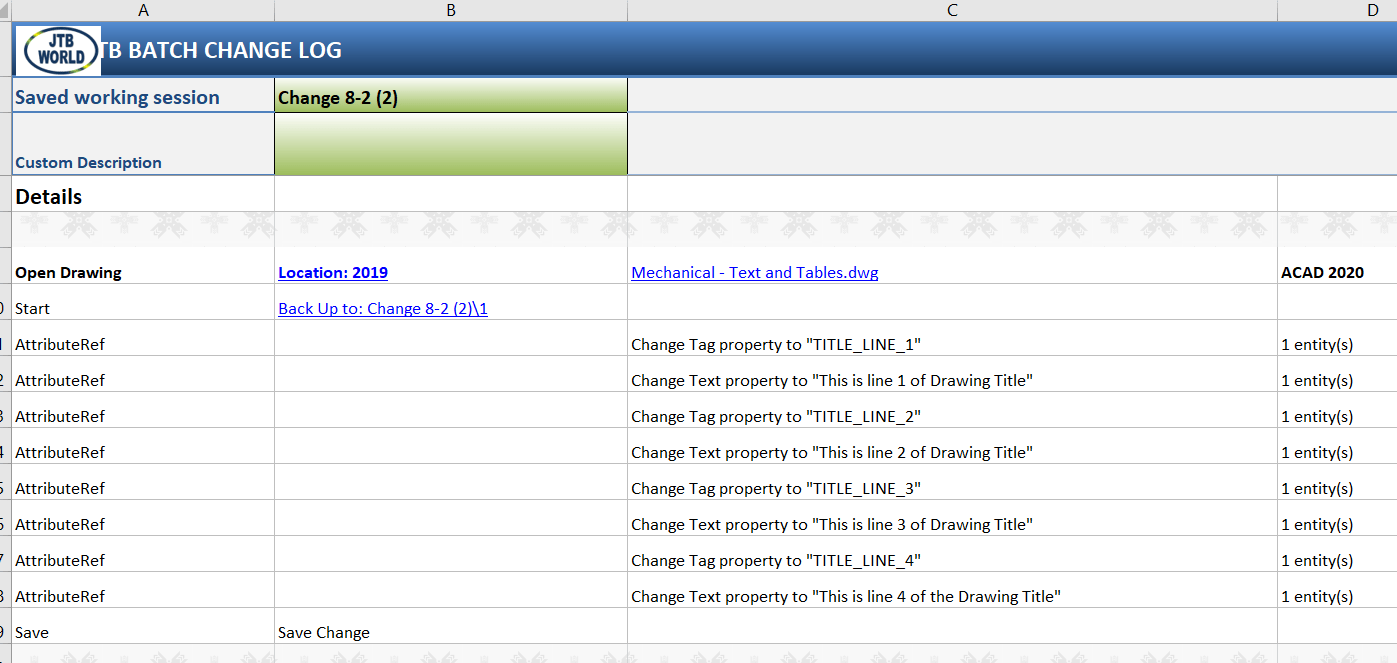
Select the 4 new command cells. Click [ Run ] command button on the top of the sheet. Then click [ Run ].
The final result will be like this:
You can add more blocks to rename into section 1, "Rename" sheet. Add more attributes to change into section 2 and 3. Then, you can add more drawings to run Batch Change to "Drawing List".